
Replacing the Hard Disk Drive
You can upgrade the hard disk drive in your MacBook Pro. The hard disk drive is
located next to the built-in battery when you open the back of your MacBook Pro.
The replacement drive must be a 2.5-inch drive with a Serial ATA (SATA) connector.
Important:
Apple recommends that you back up the data on your hard disk drive
before removing and replacing it. Apple is not responsible for any lost data.
To replace the hard disk drive in your MacBook Pro:
1
Shut down your MacBook Pro. Disconnect the power adapter, Ethernet cable, USB
cables, security lock, and any other cables connected to the MacBook Pro to prevent
damaging the computer.
WARNING:
The internal components of your MacBook Pro can be warm. If you’ve
been using your MacBook Pro, wait 10 minutes after shutting down to let the internal
components cool before continuing.
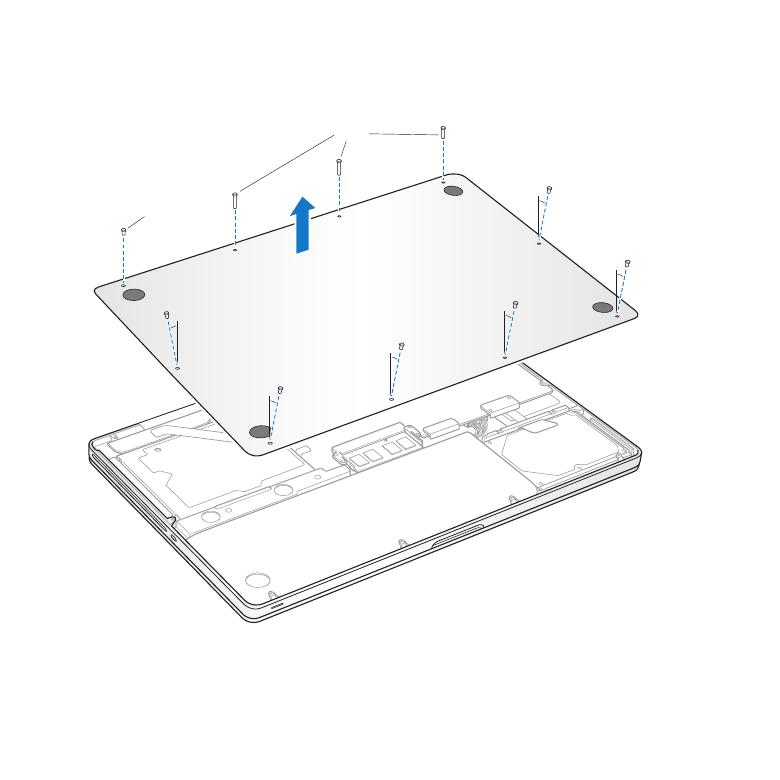
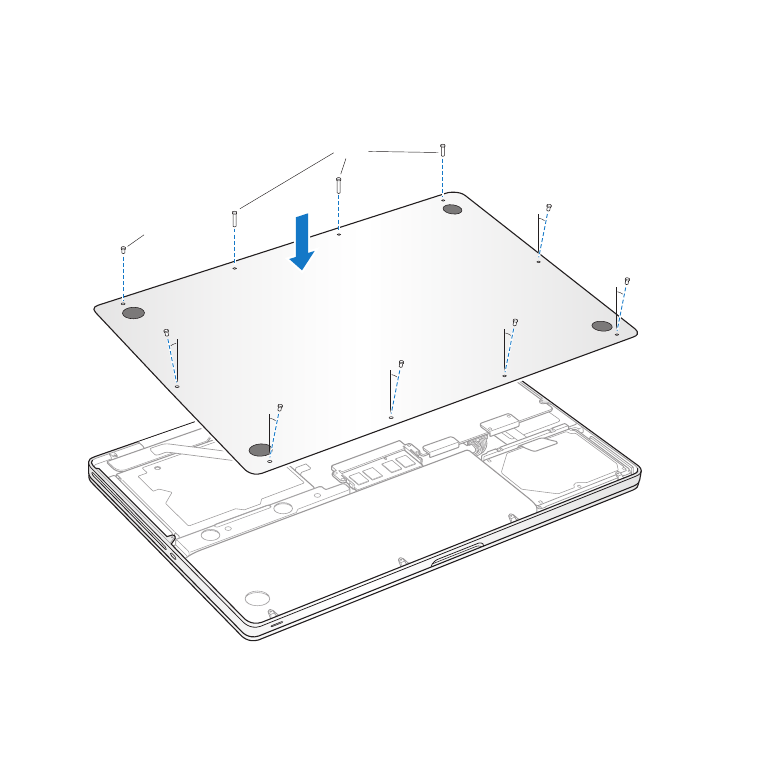
2
Turn over your MacBook Pro and remove the ten (10) screws that secure the bottom
case. Remove the shorter screws at the angles shown in the illustration. Lift off the case
and place it to the side.
38
Chapter 3
Boost Your MacBook Pro
Important:
Because the screws are different lengths, note the screw lengths and
locations so you can replace the screws correctly. Put them aside in a safe place.
Short
Long

39
Chapter 3
Boost Your MacBook Pro
Important:
When you remove the bottom case, you expose sensitive internal
components, which can be affected by static electricity.
3
Before touching the hard drive assembly, discharge any static electricity from your
body by touching a metal surface inside the computer.

40
Chapter 3
Boost Your MacBook Pro
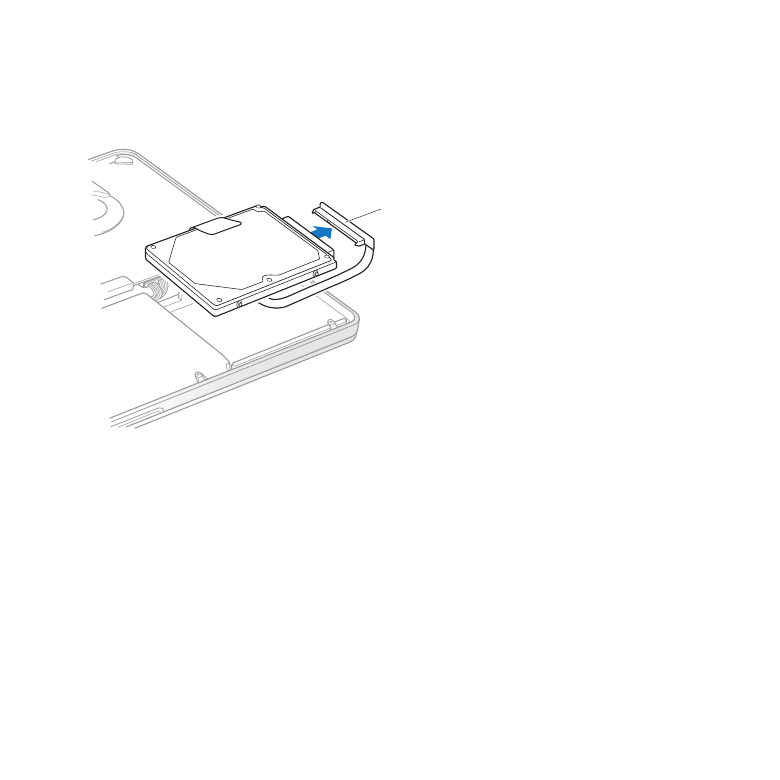
4
Locate the bracket at the top of the drive. Use a Phillips screwdriver to loosen the two
captive screws that hold the bracket in place. Put the bracket aside in a safe place.
5
Using the pull tab, gently tilt up the drive.
Bracket
Pull tab
41
Chapter 3
Boost Your MacBook Pro
6
Hold the drive by its sides and gently pull the connector on the right side of the drive
to disconnect it. Don’t press the drive between your fingers, and avoid touching the
circuitry on the underside of the drive.
Connector
The connector is attached to a cable and remains in the hard disk drive bay.
42
Chapter 3
Boost Your MacBook Pro
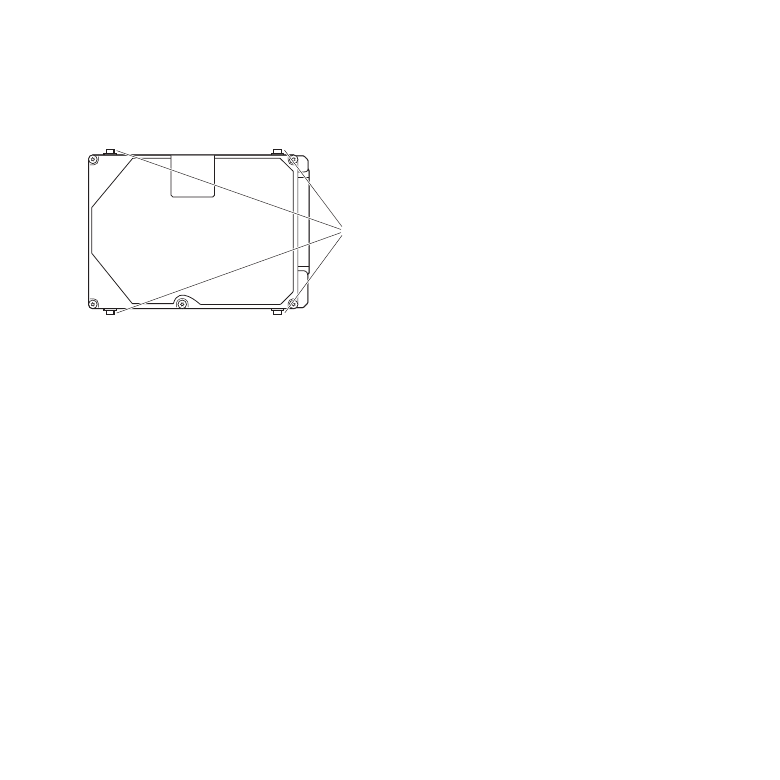
Important:
There are four (4) mounting screws on the sides of your hard disk drive. If
your replacement drive doesn’t include mounting screws, remove the ones from your
old drive and mount them on the replacement drive before you install it.
Mounting screws
7
Attach the connector to the right side of the replacement drive.
43
Chapter 3
Boost Your MacBook Pro
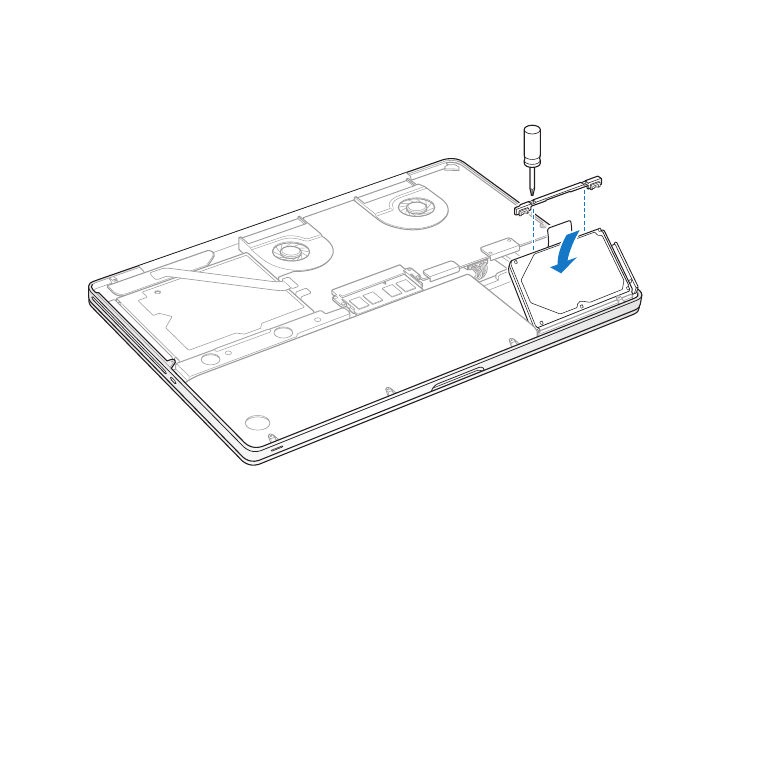
8
Insert the replacement drive at an angle, making sure the mounting screws are
seated properly.
9
Replace the bracket and tighten the screws.
44
Chapter 3
Boost Your MacBook Pro
10
Replace the bottom case. Replace and tighten the ten screws you removed in step 2 in
their proper locations, making sure to insert the shorter screws at the angles shown in
the illustration.
Short
Long
For information about installing Mac OS X and bundled applications, see “Repairing,
Restoring, or Reinstalling Mac OS X Software” on page 56.

45
Chapter 3
Boost Your MacBook Pro